
Overview
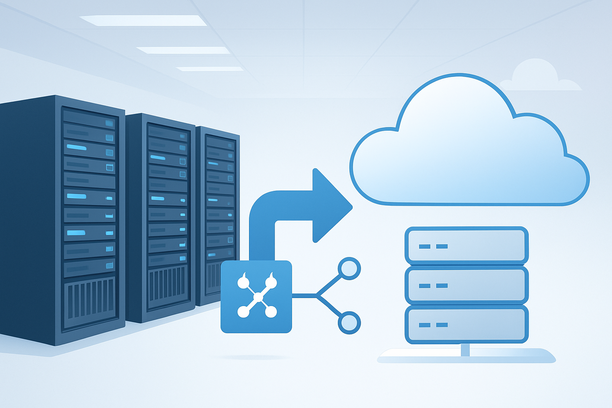
Moving a WordPress site to a new hosting provider can seem daunting, but with a structured approach, you can execute the transfer with minimal to no downtime and without harming your search engine rankings. This guide breaks down the entire migration process, from initial assessment to post-move verification, ensuring your site remains fully operational and visible to users and search engines throughout the transition.
Why Move Your WordPress Hosting?
The most common reasons for migrating are outgrowing your current plan's resources, seeking better performance, needing improved support, or desiring a more robust infrastructure for security and backups.
Before initiating a move, it's crucial to identify your primary pain point. Is your site loading slowly due to shared server congestion? Have you received resource limit errors? Are you looking for a hosting environment with specific technical advantages like NVMe storage, more RAM, or a specific data center location for lower latency to your audience? Clarifying your "why" ensures you select a new host that solves your specific problem.
How Do I Prepare My WordPress Site for Migration?
Preparation is the most critical phase for a smooth migration. A thorough backup and a documented audit of your current site form the foundation for success.
Follow these preparation steps before touching any files:
- Perform a Complete Backup: Use a plugin like UpdraftPlus or your host's control panel (like cPanel) to create a full backup of your website files and database. Download a copy to your local computer.
- Create a Site Audit Document: Note down your WordPress version, PHP version, active plugins, and active theme. A list of key plugin licenses and their current versions can be invaluable for troubleshooting later.
- Deactivate Caching and Security Plugins: Temporarily disable any caching, security, or optimization plugins on your live site to prevent file lock issues during the backup process.
- Document Your DNS Settings: Take a screenshot or copy of your current DNS records (especially A, CNAME, MX, and TXT records) from your domain registrar's control panel. This is your safety net if DNS propagation goes wrong.
- Choose Your Migration Window: Plan to migrate during your site's lowest traffic period. For many sites, this is late night or early morning in the primary audience's timezone.
What Are the Steps for a Manual WordPress Migration?
A manual migration gives you full control and is ideal for understanding the process, but it requires technical comfort with file managers and database tools.
Here is a step-by-step breakdown of the manual process:
Step 1: Export Your Old Site's Files and Database
- Log into your current hosting control panel (e.g., cPanel).
- Use File Manager or an FTP client to access your WordPress root directory (
public_htmlor similar). - Select all files and create a compressed
.zipor.tar.gzarchive of the entire WordPress installation. - Go to phpMyAdmin, select your WordPress database, and click the Export tab. Choose "Quick" export method and SQL format, then click "Go" to download the
.sqlfile.
Step 2: Set Up the New Hosting Environment
- Log into your new hosting account's control panel.
- Locate the "Add Domain" or "Addon Domains" section and set up your domain on the new server.
- If available, use the new host's auto-installer (like Softaculous) to install a fresh copy of WordPress on your domain. This helps configure file permissions and database connections correctly.
Step 3: Upload Files and Import Database
- On the new server, go to phpMyAdmin, select the database created for the fresh WordPress install, click the Import tab, and upload your old database
.sqlfile. - Using File Manager or FTP, navigate to your new WordPress root directory. Delete the default WordPress files (like
wp-contentandwp-admin) and then upload and extract your compressed backup of the old site's files. - You will now need to edit the
wp-config.phpfile in your new site's root. Update theDB_NAME,DB_USER, andDB_PASSWORDvalues to match the database credentials provided by your new host.
Step 4: Update Database URLs and Links The most overlooked step is updating internal URLs in the database from the old host to the new one. You can use a plugin like Better Search Replace on the live site or run a SQL query via phpMyAdmin to find and replace all instances of your old domain URL with the new one. This fixes media links, internal links, and widget settings.
What Should I Do After the Migration is Complete?
Post-migration verification and DNS update are critical to making the new server live without downtime.
Do not cancel your old hosting plan yet. Perform these checks on the new server before changing your domain's DNS.
- Test the Site via Temporary URL: Many hosts provide a temporary URL (e.g., `) or a hosts file tweak on your local computer to preview the site on the new server. Check all pages, forms, and login functionality.
- Verify and Reinstall SSL Certificate: An SSL certificate is typically tied to a server's IP address. After migration, you must reissue or reinstall it on the new server. Follow the domain control validation (DCV) method supported by your provider. You can choose from email validation, DNS validation, or HTTP/HTTPS validation depending on your access to the domain's email, DNS records, or root directory. Learn more about SSL validation methods here.
- Update DNS Records: Once satisfied, log into your domain registrar and update the A Record (and optionally CNAME) to point to your new server's IP address. This initiates DNS propagation, which can take up to 48 hours to complete globally, though it often happens within a few hours.
- Monitor and Finalize: After DNS propagation, test the live site extensively. Monitor server resource usage and uptime via your new host's dashboard. Once you've confirmed stability for a few days, you can safely cancel your old hosting plan and remove old backups.
Which Migration Method Is Right for Me? A Comparison
Choosing between a manual, plugin-assisted, or host-assisted migration depends on your technical skill, budget, and risk tolerance.
| Method | Best For | Pros | Cons | Risk Level |
|---|---|---|---|---|
| Manual Migration | Developers, tech-savvy users, full control. | No cost, complete oversight, educational. | Time-consuming, error-prone, requires technical knowledge. | Medium-High |
| Plugin-Assisted | Most users, balance of control and ease. | Streamlined process, automated DB replacement. | May have limitations on large sites, some plugins are premium. | Low-Medium |
| Host-Assisted | Non-technical users, large/complex sites, peace of mind. | Handled by experts, guarantees minimal downtime. | May incur a fee, less direct control. | Very Low |
How Do I Prevent SEO Ranking Loss During Migration?
The key to preserving SEO is maintaining identical content, structure, and URL integrity while minimizing server downtime.
A botched migration can cause a significant drop in rankings. To prevent this, follow this checklist:
- Maintain the exact same URL structure. Do not change permalinks during migration.
- Ensure the same content is served from the new server. Use 301 redirects only if URLs are intentionally changed.
- Avoid extended downtime. Search engines may de-index pages that are inaccessible for too long.
- Update your Google Search Console and Bing Webmaster Tools to reflect the new server's IP if it differs significantly, though DNS changes are usually sufficient.
- Check your robots.txt file on the new server to ensure it hasn't been overwritten and is allowing search engine crawlers.
- Submit your XML sitemap again after the migration is confirmed stable.
WordPress Hosting Migration Pre-Launch Checklist
Use this checklist to ensure nothing is missed before and after your migration.
Before Migration:
- Full website files and database backup created and downloaded locally.
- Current hosting plan details (PHP version, resource limits) documented.
- List of all active plugins and theme versions recorded.
- DNS records from the current setup documented.
- Caching and security plugins deactivated.
- Low-traffic migration window scheduled.
During Migration:
- New hosting environment set up with the correct domain.
- Database exported from old host and imported to new host.
- Site files uploaded and extracted in the new root directory.
wp-config.phpupdated with new database credentials.- Internal URLs and links updated using search/replace.
- SSL certificate reissued/installed on the new server.
After Migration (Before DNS Change):
- Site tested thoroughly via temporary URL or hosts file.
- All forms, login, and e-commerce functions (if any) working.
- Database and files match the old site (spot-check pages).
- Backup of the new, working site created.
Final Go-Live:
- DNS A record updated to point to the new server's IP.
- DNS propagation confirmed using online tools.
- Live site tested from multiple devices and networks.
- Google Search Console and analytics tracking verified.
- Old hosting plan cancellation scheduled (after confirming stability).
Frequently Asked Questions
Will moving my WordPress site to a new host affect my SEO?
When done correctly, migrating hosts should not affect your SEO. The critical factors are maintaining the same domain, URL structure, and content, and ensuring minimal downtime. Search engines like Google primarily associate your site with your domain name, not your server's IP address. If the migration causes extended downtime or broken links, that can negatively impact rankings temporarily.
How long does the DNS propagation take after changing hosting?
DNS propagation typically takes between 24 to 48 hours to complete worldwide, but most visitors will be directed to the new server within a few hours. During this period, some users may see the old site and others the new site. This is a normal part of the process.
Can I migrate my WordPress site without any downtime?
True zero-downtime migration is possible but technically complex, often requiring a staging server and synchronized database replication. For most scenarios, "near-zero" downtime is achievable, where the migration happens during low-traffic hours and the DNS switch causes a brief, unnoticeable transition.
Should I use my hosting provider's migration service?
If your new host offers a migration service, it's worth considering, especially for large, complex sites or if you are not technically confident. It transfers the risk to the provider and is often faster. Always check what the service includes and if there are any guarantees regarding timing or support.
What is the most common mistake during WordPress hosting migration?
The most common mistake is forgetting to update internal URLs and links in the database after uploading the site to the new server. This leads to broken media files and incorrect internal links. Using a reliable search and replace tool for this step is essential.
Conclusion and Next Steps
Migrating your WordPress hosting is a powerful way to upgrade your site's performance, security, and reliability. By following a structured preparation, execution, and verification process, you can minimize risk and complete the move confidently. Always prioritize backups, test on the new server before updating DNS, and double-check your SSL and search engine visibility settings afterward.
Once you're ready to choose a new home for your WordPress site, explore hosting plans that match your performance needs and provide the technical support to assist you. For a straightforward start, you can review the process for purchasing a new shared hosting plan here. A reliable hosting provider will make this migration process much smoother and set your site up for future growth.