
Overview
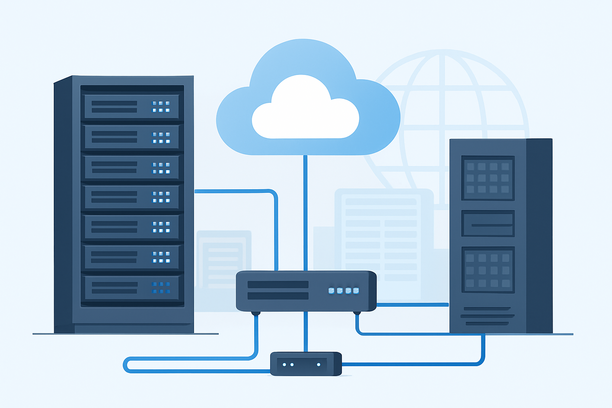
Setting up WordPress on a US server involves three main phases: provisioning server infrastructure, installing a LAMP stack with PHP and MySQL, and completing the WordPress configuration wizard through your browser. The entire manual installation typically takes 30 to 60 minutes for users with basic command-line familiarity. A US-based server reduces latency for North American visitors, simplifies compliance with domestic data regulations, and provides direct access to peering points that improve connectivity for domestic and international traffic alike.
Why a US Server Location Matters for Your WordPress Site
Latency and Route Quality
A server physically located in the United States minimizes network hops between your server and the majority of North American visitors. This geographic proximity reduces initial connection times and improves Time to First Byte (TTFB), both of which influence Core Web Vitals scores and search engine rankings. For sites targeting US audiences, routing through domestic IXPs (Internet Exchange Points) generally delivers more consistent performance than relying on overseas infrastructure.
Data Sovereignty and Compliance
Hosting on US soil keeps customer data within domestic jurisdiction, which matters for e-commerce sites, membership platforms, and any business handling personally identifiable information subject to US privacy frameworks. Choosing a US provider also simplifies support coordination and eliminates time zone friction during troubleshooting.
Network Peering and Connectivity
US data centers benefit from dense peering relationships with major ISPs and cloud networks. This translates to faster content delivery for end users and more reliable connectivity for site administrators managing uploads, backups, and remote administration tasks.
Prerequisites and Minimum Server Specifications
Before starting the installation, verify that your US server meets WordPress's resource requirements and that you have the necessary credentials and software ready.
| Component | Minimum Requirement | Recommended |
|---|---|---|
| RAM | 1 GB | 2 GB or more |
| Storage | 20 GB SSD | 40 GB+ SSD |
| CPU | 1 vCPU | 2+ vCores |
| Bandwidth | 1 TB per month | Unmetered |
| Operating System | Ubuntu 20.04+ or CentOS 7+ | Ubuntu 22.04 LTS |
| PHP Version | 7.4 | 8.1 or higher |
| Database | MySQL 5.7+ or MariaDB 10.3+ | MariaDB 10.6+ |
You will also need SSH access credentials (IP address, port, and root password) from your hosting provider, a registered domain name with DNS pointing to your server, and a local terminal or SSH client installed on your computer.
Choosing Between Shared, VPS, and Dedicated
Most WordPress beginners start on shared hosting, where resources are pooled among many accounts. A VPS (Virtual Private Server) allocates dedicated CPU and RAM, providing consistent performance and root access for custom configurations. Dedicated servers suit high-traffic sites exceeding 100,000 monthly visits or applications with heavy database workloads.
Step 1: Provisioning and Accessing Your US Server
Remote Connection via SSH
After your hosting provider provisions the server, open your terminal and connect:
ssh root@your_server_ip -p 22Accept the SSH key fingerprint when prompted, then enter the root password supplied by your provider. Once connected, you have full administrative control over the server environment.
Updating System Packages
Always begin by refreshing the package repository and upgrading existing software:
apt update && apt upgrade -yThis ensures you install the latest stable and patched versions of every component in the LAMP stack.
Step 2: Installing the LAMP Stack
Apache Web Server
Apache handles incoming HTTP requests and serves your WordPress files to visitors:
apt install apache2 -y
systemctl enable apache2
systemctl start apache2
After installation, visit your server's IP address in a browser. You should see the default Apache welcome page, confirming the web server is operational.
MySQL Database Server
WordPress stores all content, user accounts, and configuration data in a MySQL-compatible database:
apt install mysql-server -y
mysql_secure_installation
The security script prompts you to set a root password, remove anonymous users, disable remote root login, and delete the test database. Answer yes to each recommendation.
PHP and Required Extensions
PHP processes WordPress's server-side logic. Install PHP along with the extensions WordPress depends on:
apt install php libapache2-mod-php php-mysql php-curl php-gd php-mbstring php-xml php-xmlrpc php-soap php-intl php-zip -yVerify the installation by checking the version:
php -vRestart Apache to load the PHP module:
systemctl restart apache2Step 3: Creating the WordPress Database and User
Log into MySQL and create a dedicated database with a restricted user account:
CREATE DATABASE wordpress_db;
CREATE USER 'wp_user'@'localhost' IDENTIFIED BY 'your_secure_password';
GRANT ALL PRIVILEGES ON wordpress_db.* TO 'wp_user'@'localhost';
FLUSH PRIVILEGS;
EXIT;
Using a dedicated user rather than root limits the damage if your WordPress installation is ever compromised. Store the database name, username, and password securely — you will need them in the next step.
Step 4: Downloading and Configuring WordPress Core
Fetching WordPress Files
Navigate to Apache's document root and download the latest WordPress release:
cd /var/www/html
wget
tar -xzf latest.tar.gz
mv wordpress/* .
rm -rf wordpress latest.tar.gz
This places all WordPress PHP files, directories, and assets directly in the web root.
Editing wp-config.php
Copy the sample configuration file and open it for editing:
cp wp-config-sample.php wp-config.php
nano wp-config.php
Locate the database settings section and replace the placeholder values with the database name, username, and password you created earlier. Generate unique authentication keys and salts from the WordPress.org key generator and paste them into the corresponding section.
Step 5: File Permissions and Apache Virtual Host
Setting Ownership and Permissions
Apache needs read and write access to WordPress files:
chown -R www-data:www-data /var/www/html
find /var/www/html -type d -exec chmod 755 {} \;
find /var/www/html -type f -exec chmod 644 {} \;
These permissions allow Apache to serve files while preventing unauthorized modification.
Configuring a Virtual Host
Create a site configuration file for your domain:
nano /etc/apache2/sites-available/yourdomain.confDefine a VirtualHost block pointing to /var/www/html and enable mod_rewrite for clean permalinks:
a2ensite yourdomain.conf
a2enmod rewrite
systemctl restart apache2
Step 6: Completing the WordPress Installation Wizard
Open your browser and navigate to `. The WordPress installation screen appears, guiding you through the final configuration:
- Select your preferred language
- Enter your site title, administrator username, password, and email address
- Choose whether to discourage search engines from indexing the site during development
- Click "Install WordPress" to finalize
Log into the dashboard at ` using the credentials you just created. Your WordPress site is now live on the US server.
Post-Installation Security Hardening
SSL Certificate with Let's Encrypt
Secure your site with HTTPS immediately:
apt install certbot python3-certbot-apache -y
certbot --apache -d yourdomain.com -d www.yourdomain.com
Let's Encrypt provides free SSL certificates that auto-renew every 90 days. The Certbot plugin handles Apache configuration automatically.
Firewall Configuration
Restrict incoming traffic to essential services only:
ufw allow OpenSSH
ufw allow 'Apache Full'
ufw enable
A properly configured firewall blocks unauthorized access attempts and reduces your attack surface.
Essential WordPress Security Plugins
Install these plugins immediately after deployment:
- Wordfence Security: Web application firewall and malware scanning
- UpdraftPlus: Automated backups to external cloud storage
- WP Super Cache: Page caching to improve response times
- Limit Login Attempts Reloaded: Blocks brute-force login attacks
Performance Optimization After Installation
Once your site is secure, focus on speed improvements that directly impact visitor experience and search rankings:
- Enable browser caching through
.htaccessdirectives or your caching plugin - Optimize images before upload using tools like ShortPixel or Imagify
- Configure object caching with Redis or Memcached for database-heavy sites
- Deploy a CDN (Content Delivery Network) to distribute static assets globally
- Minimize active plugins to reduce database queries and HTTP requests
- Schedule regular database optimization using WP-CLI or a maintenance plugin
- Keep PHP, WordPress core, themes, and plugins updated to benefit from performance patches
FAQ
How long does it take to set up WordPress on a US server?
The complete manual installation takes 30 to 60 minutes for users with basic command-line experience. Server provisioning itself typically completes in 5 to 15 minutes depending on your hosting provider. DNS propagation — the time it takes for your domain to point to the new server — may add 24 to 48 hours, though many providers resolve within minutes.
Do I need programming knowledge to install WordPress on a VPS?
No programming or web development experience is required. You do need basic command-line familiarity: connecting via SSH, running installation commands with copy-paste, and editing a configuration file with a text editor like Nano. The WordPress installation wizard itself uses a graphical interface that requires no technical skills beyond filling in form fields.
What is the difference between shared hosting and a VPS for WordPress?
Shared hosting places your site on a server with hundreds of other users, sharing CPU, RAM, and bandwidth. This keeps costs low but limits performance and customization. A VPS allocates dedicated resources to your account, delivering consistent performance and root access for installing custom software, adjusting server settings, and optimizing the stack for WordPress specifically.
Can I install WordPress on a Windows US server instead of Linux?
Yes, WordPress runs on Windows Server with IIS as the web server. However, the vast majority of WordPress documentation, community support, and performance optimizations target Linux with Apache or Nginx. Unless you have a specific requirement for Windows-only applications, Linux is strongly recommended for WordPress hosting.
How do I back up my WordPress site after installation?
Use a plugin like UpdraftPlus to schedule automated backups to external storage such as Google Drive, Dropbox, or Amazon S3. For server-level backups, most US hosting providers offer snapshot or backup services — for example, Cloud-Native Backup Usage Instructions explains how cloud-native backup captures disk states at specific moments for restoration. Always test your backup restoration process to confirm it works before you need it.
Conclusion
Deploying WordPress on a US server gives you full control over performance, security, and configuration while placing your content close to North American audiences. The process — from provisioning through the LAMP stack setup to the WordPress installation wizard — establishes a solid foundation that shared hosting cannot match in flexibility or resource allocation.
After installation, prioritize SSL certificates, firewall rules, and automated backups before focusing on caching and CDN integration. Regular updates to WordPress core, PHP, and plugins will keep your site secure and performing well as traffic grows.
Ready to build your WordPress site on a US server with dedicated resources and reliable connectivity? Explore hosting plans that match your project's scale and performance requirements.