
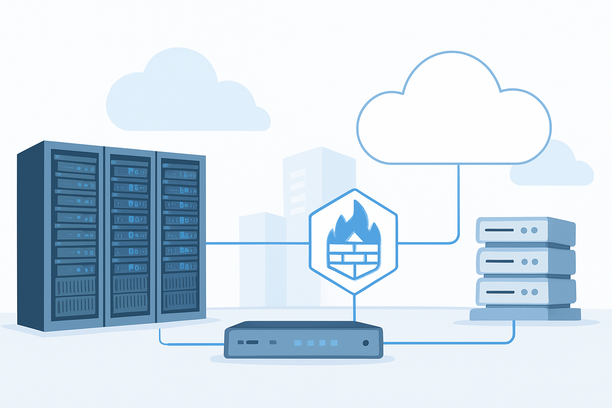
Effective WordPress security is not about a single tool but a layered defense. This tutorial provides a complete, step-by-step guide to implementing a robust firewall for your site, detailing both the foundational server-level configuration and the application-aware plugin layer. Following this process will secure your website from external network threats down to malicious web requests.
Overview
A truly secure WordPress site requires a defense-in-depth strategy that addresses threats at different points in the network request lifecycle. This tutorial will walk you through setting up two complementary firewall layers. First, you will configure your server's native firewall to act as a strict gatekeeper, permitting only essential traffic. Second, you will install and configure a WordPress security plugin to analyze the permitted traffic for WordPress-specific attacks. This dual-layer approach is the professional standard for hardening a self-managed WordPress installation.
What Are the Core Concepts Behind a WordPress Firewall?
A WordPress firewall operates at two distinct levels, each with a specific purpose. Understanding these layers is the first step to implementing effective protection.
Server-Level Firewall: This is your first line of defense. It operates at the network perimeter, controlling which ports and protocols are allowed to reach your server. Its primary job is to block all traffic except what is absolutely necessary, such as HTTP/S (ports 80/443) for your website and SSH (port 22) for administrative access. Think of it as the security gate for your entire property.
Application-Level Firewall (Plugin): This is your second, more intelligent line of defense. It operates within the WordPress application itself. After the server firewall has allowed web traffic through, the application firewall inspects each request for malicious code, suspicious patterns, and attack signatures specific to WordPress (like SQL injection or cross-site scripting attempts). It acts as the security checkpoint inside the building.
Step 1: Configuring Your Server-Side Firewall
The server firewall is the critical foundation. Its configuration depends on your server's operating system. The most common tools are ufw for Ubuntu/Debian and firewalld for CentOS/RHEL.
For Ubuntu/Debian with ufw (Uncomplicated Firewall)
ufw provides a user-friendly command-line interface to manage Netfilter rules. The process involves setting default policies and allowing essential ports.
- Install and Check Status: Verify if
ufwis installed and its current state.
sudo ufw status verbose- Set Default Policies: Start with a secure baseline by denying all incoming traffic and allowing all outgoing.
 sudo ufw default deny incoming
sudo ufw default allow outgoing- Allow Essential Ports: Crucially, always allow SSH access first to avoid locking yourself out.
 sudo ufw allow OpenSSH
 sudo ufw allow 80/tcp
sudo ufw allow 443/tcp- Enable the Firewall: Activate your ruleset.
sudo ufw enableFor a more detailed guide on these commands and precautions, such as the importance of rule order, you can consult the RAKsmart knowledge base article on Enabling and disabling the firewall in Ubuntu.
For CentOS/RHEL with firewalld
firewalld uses zones to manage traffic. The default "public" zone is suitable for a web server.
- Check and Start the Service:
 sudo firewall-cmd --state
sudo systemctl start firewalld- Add Permanent Rules: Add rules for SSH, HTTP, and HTTPS. The
--permanentflag ensures rules survive a reboot.
 sudo firewall-cmd --zone=public --add-service=ssh --permanent
 sudo firewall-cmd --zone=public --add-service=http --permanent
sudo firewall-cmd --zone=public --add-service=https --permanent- Reload to Apply: Load the new permanent rules into the runtime configuration.
sudo firewall-cmd --reloadStep 2: Selecting and Configuring Your WordPress Plugin Firewall
With the network perimeter secured, you now need a plugin that understands WordPress to inspect incoming HTTP/S requests.
How to Choose the Right Security Plugin
Leading WordPress security plugins offer a firewall module (sometimes called a Web Application Firewall or WAF). When evaluating options, focus on these key features:
| Feature | What It Protects Against | Why It Matters |
|---|---|---|
| Web Application Firewall (WAF) | SQL injection, XSS, malicious file uploads, and suspicious URLs. | The core engine that inspects and blocks harmful traffic in real-time. |
| Brute-Force Protection | Automated login attempts on /wp-login.php and XML-RPC endpoints. |
Prevents attackers from guessing passwords and gaining unauthorized access. |
| File Integrity Monitoring | Unauthorized changes to core WordPress files, themes, and plugins. | Alerts you immediately if critical files are modified unexpectedly. |
| IP Blocking & Rate Limiting | Aggressive scanners and repeat offender IP addresses. | Proactively reduces load and blocks known malicious sources. |
A Practical Setup Workflow
Do not simply activate the firewall and walk away. Follow this phased approach to avoid breaking your site:
- Install and Activate: Choose a reputable plugin (e.g., Wordfence, Sucuri, iThemes Security) from the WordPress plugin repository and activate it.
- Run the Setup Wizard: Most plugins include a guided setup. Follow it to enable core security features.
- Enable Learning/Whitelist Mode: This is a critical step. When first enabling the WAF, set it to "Learning," "Testing," or "Whitelist" mode. This allows the plugin to observe your normal traffic patterns and automatically whitelist legitimate IPs and admin activity over a period of 24 to 72 hours.
- Review Logs and Set Exceptions: After the learning period, carefully review the plugin's security logs. Look for false positives—legitimate traffic that was incorrectly flagged. Add trusted IPs (like your office or VPN) to the plugin's permanent whitelist.
- Enable Protection Mode: Once you are confident in the rule set and your whitelist, switch the firewall from learning mode to full protection mode.
Step-by-Step WordPress Firewall Implementation Checklist
Use this checklist to ensure a methodical and safe deployment.
- Pre-Configuration Audit: Document your current SSH port and confirm you have active console access to your server.
- Server Firewall Setup: Apply the necessary rules for ports 22, 80, and 443. Test that your website is still accessible and you can SSH in. Keep a backup console session open.
- Plugin Selection & Installation: Choose a security plugin and install it via your WordPress dashboard.
- Plugin Firewall Activation: Follow the plugin's wizard to enable its WAF module.
- Learning Mode Period: Enable the learning/test mode for at least 24-72 hours. Perform normal admin tasks during this time to seed the whitelist.
- Log Review & Lockdown: Analyze the plugin logs for false positives. Add legitimate exceptions. Switch the WAF to active protection mode.
- Final Validation: Use an online port scanner to verify only ports 80, 443, and your SSH port are open. Test a benign malicious-looking URL (e.g.,
yourdomain.com/?s=<script>alert(1)</script>) to confirm it is blocked.
Ongoing Monitoring and Maintenance
A firewall is not a set-and-forget tool. Regular maintenance is key to its long-term effectiveness.
- Review Logs Weekly: Check both your server firewall logs (often in
/var/log) and your security plugin's dashboard for unusual activity. - Keep Everything Updated: Regularly update the WordPress core, your security plugin, and all other plugins/themes. Updates often contain critical security patches.
- Audit User Access: Periodically review user accounts with administrative or SSH privileges and remove any that are no longer needed.
- Test After Major Changes: After installing a new plugin or theme, briefly monitor your firewall logs to ensure the new functionality isn't being incorrectly blocked.
A managed VPS or dedicated server provides the clean, configurable Linux foundation needed to implement these server-level firewall rules with confidence, allowing you to focus on the application-layer security.
Conclusion
Securing your WordPress site with a firewall involves a deliberate, two-layer strategy. By first hardening your server's network access with ufw or firewalld, and then deploying and properly configuring an intelligent WordPress security plugin, you create a powerful barrier against the vast majority of automated attacks. Start with your server firewall to define a strict perimeter, then carefully introduce your plugin's WAF using a learning phase, and commit to regular log review to maintain a secure environment. This methodical approach ensures your website remains both accessible to legitimate visitors and resilient against threats.
If you are looking for a secure and configurable hosting environment to apply these server-level security measures, explore the VPS and dedicated server options at RAKsmart.
Frequently Asked Questions (FAQ)
Do I really need both a server firewall and a WordPress plugin firewall?
Yes. They protect against different threats. The server firewall is your first line of defense, blocking unauthorized network access before it reaches your web server software. The plugin firewall is the second line, analyzing the content of allowed web traffic for WordPress-specific attacks like SQL injection. Using both provides essential defense-in-depth.
Will setting up a firewall slow down my WordPress website?
Properly configured firewalls have a negligible impact on performance. The server firewall processes rules at the network level with very low overhead. Modern WordPress security plugins are highly optimized to minimize their processing footprint. The security benefits far outweigh any minimal performance consideration.
How do I prevent a firewall from blocking my own access?
The key is the learning or whitelist mode in your plugin. Always enable this first to let the plugin learn your normal activity. Additionally, you should add your personal IP address (and those of any trusted administrators) to the plugin's whitelist manually. For the server firewall, ensure you have SSH access allowed before enabling any blocking rules.
Can I use a web application firewall (WAF) service like Cloudflare instead?
Yes, a cloud-based WAF service is an excellent additional layer that sits in front of your server. However, it should not be considered a replacement for a server-level firewall. You should still configure ufw or firewalld to restrict all ports except those essential for your services. The cloud WAF protects against DDoS and some application attacks, while the server firewall provides fundamental network protection.
What is the first thing I should do after setting up my firewalls?
Your immediate next step should be to verify your setup. Use an external online port scanner (like portchecker.co) to confirm that only your intended ports (22, 80, 443) are open to the public internet. Then, test your WordPress site's functionality to ensure legitimate traffic, including logins and admin actions, is not being blocked.