
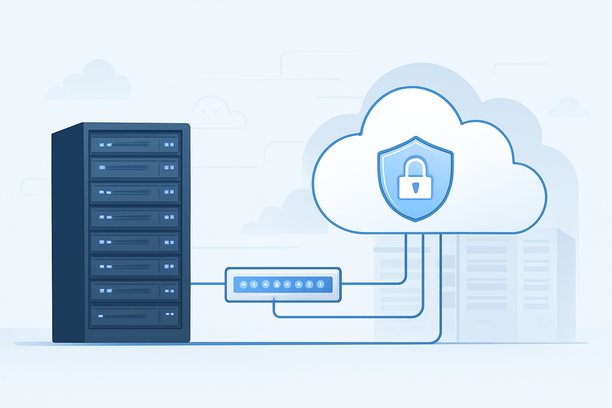
Securing a WordPress site demands more than just installing a plugin; it requires a structured, defense-in-depth approach. This guide walks you through the essential security setup process in layers, starting with the foundational network controls on your server, moving to SSL encryption, and finally hardening the WordPress application itself. Follow this blueprint to build a robust security posture for your site.
Overview
This article provides a practical, layer-by-layer implementation plan for WordPress security. We begin at the infrastructure level, configuring the virtual firewall that protects your server from unwanted traffic. Next, we ensure secure data transmission with SSL. Finally, we address the application-specific hardening of the WordPress core, login systems, and user management. This sequential approach ensures each security layer builds upon a solid foundation.
Why Start with Server-Level Security?
Before a single WordPress file is compromised, your server must first withstand a barrage of automated scans and targeted attacks. The most effective first line of defense is a well-configured network firewall, which in cloud environments is managed via a Security Group.
A Security Group acts as a virtual firewall, controlling all inbound and outbound traffic to your server. Properly configuring it is non-negotiable for security. For a standard WordPress site, the essential inbound rules are typically limited to a few critical ports:
- TCP Port 80 (HTTP): Required for unencrypted web traffic.
- TCP Port 443 (HTTPS): Essential for encrypted web traffic.
- TCP Port 22 (SSH) or 3389 (RDP): For administrative access, but this rule should be tightly restricted to your trusted IP address(s) using an IP whitelist.
This configuration ensures your server only accepts traffic on ports necessary for its function, dramatically reducing the attack surface. Providers like RakSmart offer intuitive interfaces for managing these security group rules, allowing you to create and apply a strict policy with just a few clicks.
Configuring Your Security Group: A Practical Walkthrough
The process generally involves creating a named security group, then defining precise rules within it. Rules are defined by priority, protocol, direction (inbound/outbound), and port range. A lower priority number typically indicates higher precedence. Remember to associate the configured security group with your specific server instance for the rules to take effect.
For a detailed, step-by-step guide on creating and managing these network rules for both VPS and cloud native servers, you can refer to the official documentation for VPS Security Group User Guide and Cloud Native Security Group Settings.
Implementing SSL Encryption for Data in Transit
With your network perimeter secured, the next critical step is to encrypt all data between your server and your visitors' browsers. This protects login credentials, personal data, and ensures the integrity of your site. The core requirement is installing and properly validating an SSL certificate.
Understanding Domain Control Validation (DCV)
Before a Certificate Authority (CA) issues your certificate, you must prove you control the domain. One common method is HTTP validation. The CA provides you with a specific validation file containing a unique code.
- Place the Validation File: You must create the specified directory path (
/.well-known/pki-validation/) in your website's root folder and place the text file with the exact provided content inside it. - Verify Accessibility: Ensure the file is publicly accessible via the web at the URL provided by the CA. A successful check will display the file's content in a browser.
- Complete Validation: Once the CA's crawler can access the file, validation is complete, and the certificate will typically be issued within minutes.
This process confirms domain ownership and is a fundamental security step before serving encrypted traffic.
Hardening the WordPress Core Installation
With server and transport security established, you now harden the application itself. These steps make the WordPress software more resistant to common attacks.
Essential File and Database Configuration
- Change Database Table Prefix: During installation, change the default
wp_table prefix to a unique string. This thwarts simple SQL injection attacks that target default names. - Secure File Permissions: Set directories to
755and files to644. Thewp-config.phpfile should be400or440(read-only by owner). For extra security, movewp-config.phpone directory above the public web root. - Disable File Editing: Add
define('DISALLOW_FILE_EDIT', true);towp-config.php. This prevents administrators from editing theme and plugin code directly from the dashboard, forcing changes through a safer version control process.
Removing Default and Unnecessary Content
Delete the default "Hello World" post, sample page, and comments. Most importantly, delete the default "admin" user account. Never use "admin" as a username for your primary administrator account.
Fortifying WordPress Login Security
The login page (/wp-login.php) is the most frequent target for brute-force attacks. Hardening it is a high-impact security measure.
- Enforce Strong Passwords: Use a plugin to require complex passwords for all users.
- Enable Two-Factor Authentication (2FA): Add a plugin that requires a second verification step (like a code from an authenticator app) for login.
- Change the Default Login URL: Use a plugin to move the login page from the standard
/wp-login.phpto a custom URL. This stops most automated bot attacks. - Limit Login Attempts: Configure a security plugin to temporarily lock out users or IP addresses after multiple failed login attempts.
Choosing and Configuring a Security Plugin
A comprehensive security plugin consolidates many protection features into a single management interface. Here’s what to look for:
| Feature | Purpose | Why It's Essential |
|---|---|---|
| Web Application Firewall (WAF) | Filters and blocks malicious traffic (like SQL injection, XSS) before it reaches your site. | Acts as a primary shield against application-layer attacks. |
| Malware Scanner | Scans core files, themes, and plugins for known malware signatures and suspicious code. | Provides proactive detection of malicious files. |
| File Integrity Monitoring | Checks for unauthorized changes to core WordPress, theme, or plugin files. | Alerts you to tampering, enabling quick restoration from clean backups. |
| Security Activity Log | Records events like logins, file changes, and user actions. | Crucial for auditing, investigating breaches, and understanding attack patterns. |
Select a reputable suite that includes these core functions and configure its recommended settings.
Establishing a Backup and Maintenance Routine
Security is not a one-time setup but an ongoing process. Maintenance keeps your defenses effective against new threats.
- Implement a 3-2-1 Backup Strategy: Maintain 3 copies of your data, on 2 different types of media, with 1 copy stored off-site (e.g., on a separate cloud storage service). Schedule automated daily or weekly backups.
- Create a Maintenance Checklist: Schedule weekly tasks to:
- Update WordPress core, themes, and plugins promptly.
- Review and remove unused themes and plugins.
- Check user accounts and roles, applying the principle of least privilege.
- Scan for malware and review security logs.
- Test your backup restoration process quarterly.
FAQ
How often should I update WordPress and its plugins?
You should update WordPress core, themes, and plugins as soon as a stable update is released. Most updates include patches for known security vulnerabilities. Enable automatic minor updates for core and monitor for updates daily.
Is a security plugin absolutely necessary?
While you can perform many hardening steps manually, a security plugin automates ongoing protection like malware scanning, firewall rule updates, and file integrity checks. It provides a consolidated dashboard and is highly recommended for most users.
Can I use the same security setup for a small blog and a business site?
The core principles—secure accounts, updates, backups—are universal. However, a business site handling sensitive data should implement all layers with stricter policies, such as more frequent backups, advanced 2FA, and possibly a Web Application Firewall (WAF) service at the network edge.
What should I do if my site is hacked?
First, take the site offline or put it in maintenance mode. Change all passwords (hosting, FTP, database, WordPress admin). Scan for and remove malicious files. Restore your site from a clean, pre-hack backup if possible. Investigate the log files to find the vulnerability and patch it before bringing the site back online.
How does my hosting choice affect security?
A secure hosting provider implements infrastructure-level protections like firewalls, regular server patching, and isolation between accounts. Features like managed security groups and easy SSL deployment simplify your setup process, allowing you to focus on application-level hardening.
Conclusion
By systematically securing your environment from the network perimeter inward—starting with a tightly configured server security group, enforcing encrypted connections with SSL, and rigorously hardening the WordPress core and login system—you establish a powerful, layered defense. This proactive, structured approach significantly reduces your site's attack surface and protects it from the most common threats.
If you're starting a new project or looking to simplify this setup, exploring hosting providers with integrated security management can provide a more streamlined foundation. For instance, solutions like those offered by RakSmart can help you quickly establish these initial security layers, allowing you to focus on your content.